So I made a status update on my Facebook page a few weeks back where I promised myself (and all of my friends) that I would use this summer to actually utilize some of the recipes, projects, etc that I have been pinning onto my Pinterest boards.
My Boards
I have done a few things already and have taken pictures of the process but never posted them anywhere or really talked about them. Then I remembered duh. I have a blog I can use.
Over the course of the next two months I am going to blog about my Pinterest project and have pictures as well :)
OF COURSE I cannot take on such a project without making a project out of it! So what I am going to do it choose a couple dozen (maybe more) of my pins, print them out, organize them, and what have you into a binder. When I have completed a project, I will blog about it complete with pictures.
Stay tuned!
Sarah's Make and Bake
A place for me to post my baking and crafting projects.
Enjoy!
![]()
Monday, July 2, 2012
Thursday, March 1, 2012
Photo Album
I did not make this photo album...my mom did :) It holds 100 4x6 photos and is completely customizable!


She made this for me to give as a gift to a family Packer fan. She has done so many different styles\themes from weddings, graduations, babies, holidays\seasons, everyday, etc. She has also done different size albums as well. Each one is truly OOAK because she refuses to make the same one twice, unless specifically asked.
I'm trying to get her product out there because she is doing an arts and crafts show in September and would LOVE to open her own Etsy shop. In fact, keep an eye on my Etsy shop because I will be listing some of her albums for a trial run in the near future!
Thank You Card
With an upcoming baby shower, I wanted to make my own thank you notes. I recently bought some block 'thank you' stamps and used the cards and paper I had on hand. For some reason, I did not want to go with a baby theme, or even the theme of the shower (rubber duckies). Spring is on the way and I thought some nice bright colors would be fun to look at.
I cut the scallop shape from my cricut (accent essentials)on white cardstock and stamped the sentiment in black. Before I attached the scallop to the card, I thought it looked a little blah, so I colored the scallop with some of the colors that are in the card itself. With this one, I used three colors, but I'm thinking for the rest of them, I will just use one color. If I had matching inks or markers, I most likely would have done the stamp in a coordinating color.
I attached the scallop with puffy adhesive dots so it stands out a bit from the card. And because I've been having issues with glues lately, even the tiniest bit causes my paper\cardstock to curl. I have glue that is specifically stated for scrapbooking and papercrafting, too. Anywho. The scallop doesn't stand too far out from the card itself and now that I'm thinking of it, I should probably take a side picture to show the dimension....
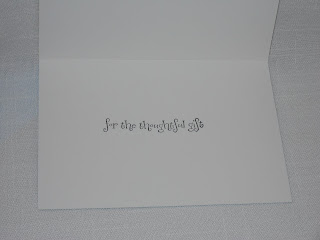
The inside has another stamped phrase. Sometimes a completely blank inside can be daunting!
And of course, the back is stamped with my Little Princess 'brand' :)
Here is the one card that is 100% completed. I'll post again when I have them all done, since there are a few different pattern\color styles to the cards :)


I cut the scallop shape from my cricut (accent essentials)on white cardstock and stamped the sentiment in black. Before I attached the scallop to the card, I thought it looked a little blah, so I colored the scallop with some of the colors that are in the card itself. With this one, I used three colors, but I'm thinking for the rest of them, I will just use one color. If I had matching inks or markers, I most likely would have done the stamp in a coordinating color.
I attached the scallop with puffy adhesive dots so it stands out a bit from the card. And because I've been having issues with glues lately, even the tiniest bit causes my paper\cardstock to curl. I have glue that is specifically stated for scrapbooking and papercrafting, too. Anywho. The scallop doesn't stand too far out from the card itself and now that I'm thinking of it, I should probably take a side picture to show the dimension....
The inside has another stamped phrase. Sometimes a completely blank inside can be daunting!
And of course, the back is stamped with my Little Princess 'brand' :)
Here is the one card that is 100% completed. I'll post again when I have them all done, since there are a few different pattern\color styles to the cards :)


Sunday, February 5, 2012
Franken-Mallows
I wanted to try something different than just the same ol pretzels that I had been doing for Lea's class. I thought about a couple different treats that would utilize what I had on hand as well.
I had marshmallows, lollipop sticks, and candy melts. For grins, I thought about putting the marshmallows on the sticks and dipping them. I made a couple and my kids loved them so that was it. Since it was Halloween, I tried to figure out how to make them holiday-appropriate. They were the perfect shape for Frankenstein heads!
Stuck the marshmallow on the stick. Dipped in melted green candy melts and stuck them in a box to dry. As they dried, I melted chocolate melts for the hair\top of the heads. I dipped just a bit of the top in the chocolate and stuck them back in the box to dry. I had some cake decorating gel pens that I drew the faces and neck screws on with.
I initially wanted to stick them in individual bags and tie off with Halloween ribbon so the kids could just take them home. But the decorating gel doesn't really dry and the bags would have ruined the look. I kept them in the box, covered with foil and just handed them out. They were a BIG hit :)


Wednesday, February 1, 2012
Birth Announcements
I know I just posted, but I wanted to get this on here before I forgot!
I don't like to have to rely on some ginormous company to relay important information to family, like a birth announcement. So for my first 2 kids, I made my own. LOVED Lea's, I'll have to find it and post it. Topher's was along the same lines as Lea's but more hastily thrown together, and I think it showed. With unknown -gender Number 3 due at the end of March, I figured I should get started on them now so all I have to do is fill out the important info, add a picture, and off they go!
Lea was 3 months old before her birth announcements went out.
But..uhh..that's neither here nor there... *cough*
I thought of using paper to create a pocket to add in the stats and a picture because some people will want to keep the picture but not the rest of the info. I found some cute printed paper that I feel is gender neutral but at the same time, not nursery\baby-ish. And a nice solid to go with it.
Also in my mess of stamps, I had not one baby themed stamp! So I got to buy some! This was also my first venture into the acrylic cling stamps. LOVE THEM! And such a space saver! No more blind stamping or bulky wooden blocks..yay! And in some cases, an entire sheet of stamps costs less than one wooden block stamp! The sheet that I got has 20 individual stamps on it. (http://www.joann.com/fiskar-clear-stamps-special-delivery/zprd_02315471a/)
The clear blocks you put the stamp on are a little pricier (always depends on the brand too), but those tend to be one-time purchases. I got a 2 pack that has a small block and a medium one.
Anyway....this is what I came up with. The end product measurement is 6in x 6in. The stat card (which is clearly my sample piece, can you tell I need new ink?) is 3.75in by 5in, and I will most likely color in the buggy with colored pencils. The pocket is also big enough to hold a 3.5in by 5in picture.

I LOVE how it turned out. And it can be easily changed to pink, blue, characters or whatever your theme is!
I don't like to have to rely on some ginormous company to relay important information to family, like a birth announcement. So for my first 2 kids, I made my own. LOVED Lea's, I'll have to find it and post it. Topher's was along the same lines as Lea's but more hastily thrown together, and I think it showed. With unknown -gender Number 3 due at the end of March, I figured I should get started on them now so all I have to do is fill out the important info, add a picture, and off they go!
Lea was 3 months old before her birth announcements went out.
But..uhh..that's neither here nor there... *cough*
I thought of using paper to create a pocket to add in the stats and a picture because some people will want to keep the picture but not the rest of the info. I found some cute printed paper that I feel is gender neutral but at the same time, not nursery\baby-ish. And a nice solid to go with it.
Also in my mess of stamps, I had not one baby themed stamp! So I got to buy some! This was also my first venture into the acrylic cling stamps. LOVE THEM! And such a space saver! No more blind stamping or bulky wooden blocks..yay! And in some cases, an entire sheet of stamps costs less than one wooden block stamp! The sheet that I got has 20 individual stamps on it. (http://www.joann.com/fiskar-clear-stamps-special-delivery/zprd_02315471a/)
The clear blocks you put the stamp on are a little pricier (always depends on the brand too), but those tend to be one-time purchases. I got a 2 pack that has a small block and a medium one.
Anyway....this is what I came up with. The end product measurement is 6in x 6in. The stat card (which is clearly my sample piece, can you tell I need new ink?) is 3.75in by 5in, and I will most likely color in the buggy with colored pencils. The pocket is also big enough to hold a 3.5in by 5in picture.


I LOVE how it turned out. And it can be easily changed to pink, blue, characters or whatever your theme is!
Pretzels!
Growing up, I always only ever had chocolate covered pretzels when I would join my mom at craft shows. As a kids those were super boring, so I rarely had pretzels :)
When I tried, and failed, at candy making, I still had molds and melts leftover that were too good (and expensive) to throw away. We had some pretzel rods and thought why not? Plus it was in time for one of Lea's class parties, so who better to be guinea pigs than a room full of kindergartners? The first party I got to do them for was Christmas\Holiday, but I didn't get a picture. The first party I got a picture for was Valentine's. The kids loved them, the teachers loved them and I got a request for them for the next party :)

The next time I made them I did some for St. Patrick's Day. No party, just a treat.

 I definitely need to work on my drizzling skills..LOL. I like using fun sprinkles to make them cute to look at as well as taste yummy. Thinking of maybe playing with different types of 'crunches'; cookies n cream, caramel, chocolate, etc, to try 'gourmet' type flavors.
For their Easter\Spring party, I was short on cash so wasn't able to get cute sprinkles or sugars. Instead I bought the color burst melts which are white (vanilla) melts with colored sugars (I think sugars) mixed in. That way, there was color involved at less cost (and work) for me.
 Cell phone picture, so the colors may not appear nicely.
When Chris transferred to a different plant at his job, he wanted to bring in a treat for his then current co-workers. I had two bags of melts and a tub of pretzel rods, perfect. Even better, the melts were green and yellow. Living in a Chicago suburb, we catch a lot of flack for being Packer fans. Luckily Chris' co-workers liked to playfully tease him about it, so I made Packer pretzels for his last day. :)

Drizzling has gotten better, but I need to figure out how I can do several at a time, in a small space, without them getting stuck together!
When I tried, and failed, at candy making, I still had molds and melts leftover that were too good (and expensive) to throw away. We had some pretzel rods and thought why not? Plus it was in time for one of Lea's class parties, so who better to be guinea pigs than a room full of kindergartners? The first party I got to do them for was Christmas\Holiday, but I didn't get a picture. The first party I got a picture for was Valentine's. The kids loved them, the teachers loved them and I got a request for them for the next party :)

The next time I made them I did some for St. Patrick's Day. No party, just a treat.


For their Easter\Spring party, I was short on cash so wasn't able to get cute sprinkles or sugars. Instead I bought the color burst melts which are white (vanilla) melts with colored sugars (I think sugars) mixed in. That way, there was color involved at less cost (and work) for me.

When Chris transferred to a different plant at his job, he wanted to bring in a treat for his then current co-workers. I had two bags of melts and a tub of pretzel rods, perfect. Even better, the melts were green and yellow. Living in a Chicago suburb, we catch a lot of flack for being Packer fans. Luckily Chris' co-workers liked to playfully tease him about it, so I made Packer pretzels for his last day. :)

Drizzling has gotten better, but I need to figure out how I can do several at a time, in a small space, without them getting stuck together!
Sunday, January 29, 2012
Cupcakes!
I love cupcakes. I mean, who doesn't? I very much prefer mini ones over regular size because then you don't feel so bad for eating more than one. And you can sample several flavors that way.
This summer, I tried two different kinds. I made rainbow\tye-dyed cupcakes for Lea's t-ball team's end of season picnic. It was super hot and I didn't want the frosting to melt, so I had a can of whipped cream in a freezer bag full of ice. That way I was able to top the cupcakes as fast as little hands were grabbing for them.
Of course, this was when I was only taking pictures of finished products, not step-by-step. BUT these were a hit so I'm very sure I will be making these again. All I did was..
Prepare a box of white cake mix.
Divide the batter into freezer bags, one bag per color desired.
Add food coloring to each bag and mix well.
Snip a small corner of the bag. This makes it SUPER easy to measure the batter into cups. If you are doing mini cupcakes, snip the smallest hole as you can so its easier to manage.
Squeeze just a small amount into the cups, when you add all the colors, you want the cup about 3 quarters full. Just as if you were making regular ol cupcakes.
Bake as normal and the end!

Another day, after grilled burgers and veggies, I thought about hamburgers in dessert form. So I prepared yellow cake mix to make mini-cupcakes and a pan of brownies. Sliced the cupcakes in half for the 'bun'. Used a small circle cutter to cut circles out of the brownies. Melted some yellow and red candy melts, tinted some vanilla frosting green and put it all together! I wasn't 100% happy with the turnout but because it was the first time and I had done it on a whim, I was glad with how they did turn out. Definitely a little more prep-work next time.

Subscribe to:
Posts (Atom)